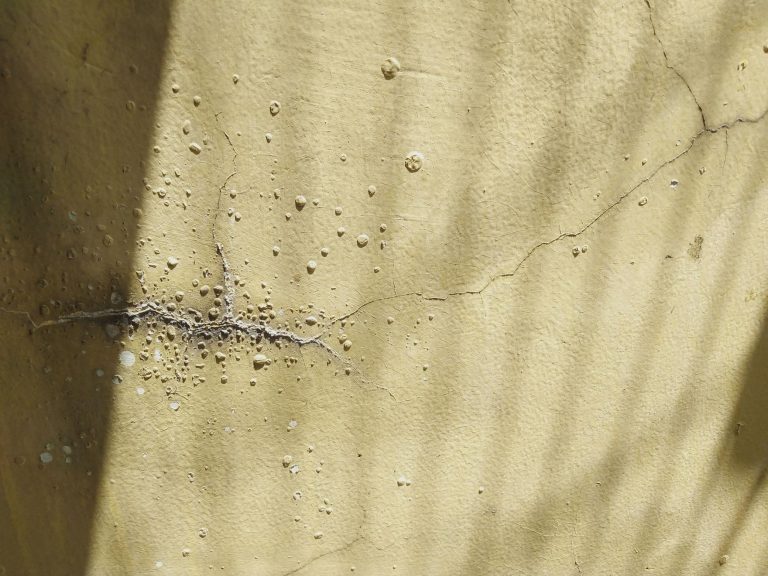
Hidden Water Damage That Turns a Small Reno Into a Rebuild
A small renovation project can quietly turn into a full-scale rebuild the moment a contractor opens a wall and finds rot, mold, or warped subfloor nobody knew existed. Hidden water damage is one of the most common budget-busters in home improvement, and it rarely announces itself until demolition is already underway. Understanding where this damage hides, what causes it, and how to catch it early can save you thousands of dollars and months of unexpected work. This guide walks through the warning signs, the systems most often affected, and the decisions homeowners face once concealed damage is discovered.
Signs of Moisture Behind Walls and Under Floors
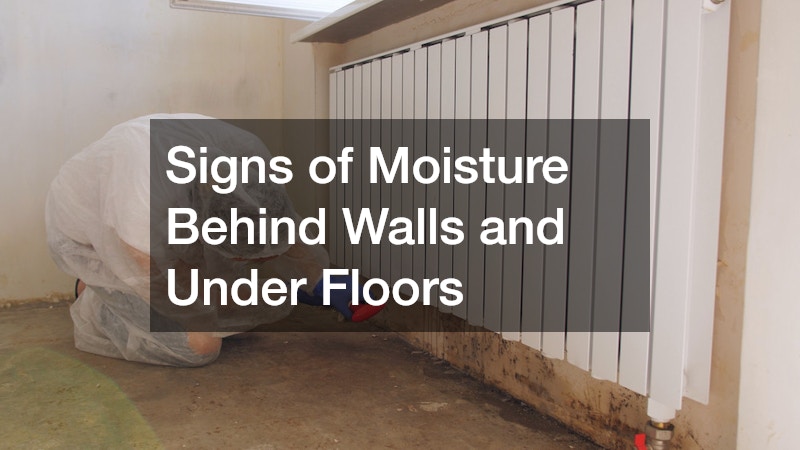
Water damage often develops for years behind drywall or under flooring before it becomes visible, which is why so many homeowners are blindsided during a renovation. Subtle clues like a musty smell, peeling paint, or a slightly soft spot in the floor are frequently dismissed as cosmetic issues rather than symptoms of a bigger problem. By the time discoloration or bubbling appears on a wall, the moisture has usually been present long enough to affect framing or subflooring underneath.
- A persistent musty odor that returns even after cleaning
- Bubbling, flaking, or discolored paint and wallpaper
- Floors that feel spongy, uneven, or squeak in new spots
- Baseboards that appear warped or separated from the wall
- Unexplained upticks in humidity or condensation on windows
Common Sources of Slow Leaks in Older Homes
Older homes are especially prone to hidden water intrusion because plumbing, roofing materials, and waterproofing methods have all evolved significantly over the decades. A slow drip from an aging supply line or a slightly cracked drain pipe can saturate wood framing for years without ever creating a visible puddle. In many cases, homeowners only learn about the source once they call in water restoration services, whose crews arrive with moisture meters and thermal imaging equipment to trace the path of intrusion.
Bathrooms, kitchens, and laundry rooms are the usual suspects, but hidden damage can also stem from exterior sources like poorly sealed windows or aging siding. Because these leaks are gradual, the damage tends to spread laterally along framing members, which is why a small stain can indicate a much larger affected area than expected.
- Corroded or loosely fitted supply lines under sinks
- Failing wax rings or seals around toilets
- Cracked or disconnected drain pipes inside the walls
- Deteriorated caulking around tubs and showers
- Poorly flashed windows or exterior penetrations
The Role of an Aging or Damaged Roof
Roof problems are one of the leading causes of hidden water damage because leaks can travel far from their original entry point before ever showing up on a ceiling. Water can follow a rafter or truss for several feet, soaking insulation and sheathing along the way, which means a small stain in one room might indicate a much larger issue in the attic. This is especially common with aging shingles, deteriorated flashing, or ice dams that force water backward under the roofline.
Homeowners often postpone a full roof replacement because the visible damage seems minor, not realizing that moisture has already compromised the decking underneath. Once a renovation begins and ceilings are opened up, contractors sometimes discover that what looked like a simple patch job actually requires replacing large sections of framing and insulation.
- Missing, cracked, or curling shingles
- Rusted or damaged flashing around chimneys and vents
- Sagging rooflines that suggest saturated decking
- Water stains that appear far from the actual leak source
- Granules collecting in gutters, signaling shingle breakdown
How Water Damage Spreads Through Framing and Subfloor
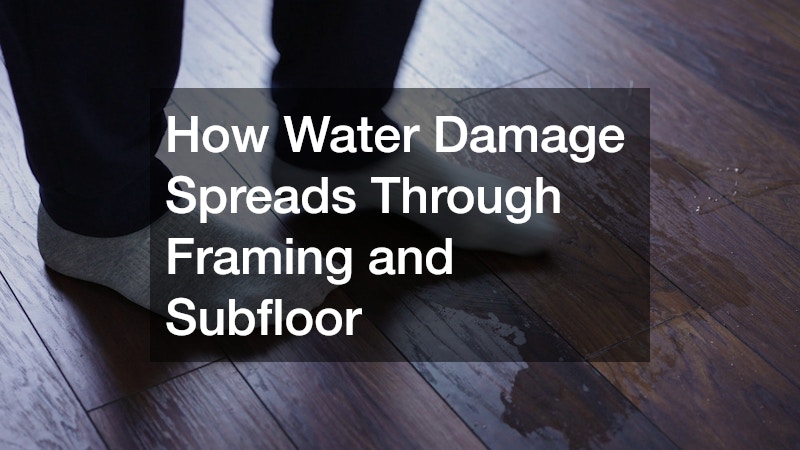
Wood framing acts almost like a sponge once it comes into repeated contact with moisture, wicking water along studs, joists, and subfloor panels far beyond the original leak site. This is why a project that starts as replacing one section of flooring can quickly expand once contractors realize the plywood underneath has delaminated or the joists have started to soften. Even a straightforward hardwood flooring installation can turn into a much larger undertaking if crews discover that the subfloor can no longer support new material without repairs. Left unaddressed, this kind of damage can compromise structural integrity, not just the finished surfaces homeowners see every day.
Mold growth frequently accompanies this kind of spread, since damp wood and stagnant air behind walls create ideal conditions for fungal growth within 24 to 48 hours of sustained moisture exposure. Identifying the true extent of the damage typically requires removing drywall or flooring well beyond the visibly affected area, which is often the moment a simple repair becomes a larger rebuild.
- Soft or spongy sections of the subfloor near walls or fixtures
- Discolored or crumbling joists visible from a crawlspace
- Musty smells concentrate in one area of a room
- Nails or fasteners that have started to rust or pop
- Visible mold growth on the underside of the removed flooring
When a Simple Flooring Update Uncovers Bigger Problems
Many homeowners start a renovation with a simple goal, like updating dated carpet or tile, only to discover subfloor rot once the old material is pulled up. This is one of the most common ways a modest project turns into a major undertaking, since the damaged subfloor has to be replaced before any new material can be installed. A qualified flooring contractor will typically inspect the subfloor thoroughly before installation begins, which is why estimates sometimes change once the old flooring is removed.
The type of new flooring chosen can also affect how much prep work is needed. A luxury vinyl tile floor is more forgiving of minor subfloor imperfections thanks to its flexible underlayment options, while other materials may require additional leveling compound or plywood underlayment to create a stable base. Knowing this distinction upfront helps homeowners set realistic expectations before demolition begins.
- Always request a subfloor inspection before finalizing a flooring quote
- Ask whether moisture testing will be done prior to installation
- Check whether any water stains or discoloration are visible on the underside of the removed flooring
- Budget a contingency fund of 15 to 20 percent for hidden repairs
- Confirm whether old flooring removal is included in the estimate
Kitchen and Bathroom Cabinetry as an Early Warning System
Cabinetry often reveals water damage before homeowners notice it anywhere else in the room, since cabinets sit directly against walls and plumbing lines that are prone to slow leaks. Swollen particleboard, warped cabinet bottoms, or a musty smell coming from under the sink are all signs that moisture has been present for some time. In many kitchen remodels, removing old kitchen cabinetry is the moment contractors discover water-damaged wall studs or subfloor that had gone unnoticed for years.
Bathroom vanities are just as telling, particularly in homes where caulking around the sink or tub has deteriorated. Catching these signs early, before a full renovation is even planned, can prevent a simple cabinet swap from turning into a project that involves replacing drywall, flooring, and framing all at once.
- Check under sinks for swelling, staining, or soft wood
- Open cabinet doors and smell for mustiness near plumbing lines
- Look for dark rings or bubbling on the underside of countertops
- Inspect the caulk seal where cabinets meet backsplashes or walls
- Note any doors or drawers that have started sticking recently
Countertops and Surfaces That Signal Trouble Below

Countertops can act as an unexpected indicator of water damage, especially around sink cutouts and seams where water intrusion is most likely. Cracking, bubbling laminate, or a countertop that feels slightly uneven near the sink can point to moisture that has worked its way into the cabinet base below. When homeowners bring in countertop services for an upgrade, installers sometimes find that the substrate underneath needs reinforcement or replacement before new material can be safely installed.
Natural stone and solid surface countertops are generally more resistant to visible damage, but that doesn’t mean the structure supporting them is immune to moisture problems. It’s worth having any suspicious staining or softness addressed before investing in new countertops, since installing beautiful new surfaces over a compromised base only delays the inevitable repair.
- Inspect seams near sinks for soft spots or gaps
- Watch for laminate edges that have started to peel or swell
- Feel for slight give or unevenness near faucet areas
- Ask installers to check the cabinet support structure before installation
- Address any staining on the underside of the counter promptly
Deciding Between Repair and a Larger Rebuild
Once hidden water damage is uncovered, homeowners face a genuinely difficult decision: repair only what’s visibly affected, or take the opportunity to address the full scope of the problem. A thorough moisture assessment will typically reveal exactly how far the damage extends, which helps homeowners understand whether a targeted repair is realistic or if a broader rebuild makes more sense. Tools like moisture meters, thermal imaging, and borescope inspections inside wall cavities can show whether water traveled several feet beyond the original leak point, which is common with plumbing failures and roof intrusions.
Several factors should guide the decision. The age and material of the structure matter: older homes with plaster walls or original subflooring often hide damage more extensively than newer construction with moisture-resistant materials. The source and duration of the leak matter too, since a pipe that’s been slowly weeping for two years will have caused far more hidden deterioration than a sudden, quickly-fixed supply line burst.
Cost comparisons are also worth running side by side. A targeted repair might run a few thousand dollars, but if 30% or more of the surrounding framing, subfloor, or drywall shows moisture readings above acceptable levels, a rebuild often ends up cheaper per square foot than repeated patch jobs. Homeowners should also factor in resale value, since buyers and inspectors alike are wary of homes with a history of water damage that wasn’t fully remediated.
Cutting corners at this stage often leads to recurring problems, including mold regrowth or structural issues that resurface within a year or two. A qualified contractor or restoration specialist can help translate the assessment findings into a clear cost-benefit picture, rather than leaving homeowners to guess at how far the rot, mold, or warping truly extends.
Once water damage spreads into multiple rooms or compromises load-bearing walls, floor joists, or foundation elements, the math often shifts in favor of a full rebuild rather than a series of patches. A good rule of thumb: if repair costs are creeping past 30-50% of what a comparable rebuild would cost, or if contractors keep finding new damage every time they open a wall, it’s worth stepping back and looking at the bigger picture.
This is where some homeowners choose to bring in a custom home builder rather than tackling the space piecemeal. A builder can coordinate structural repairs, updated layouts, and finish work as one integrated project instead of stringing together separate contractors for framing, plumbing, electrical, and drywall over several months.
There are practical advantages to this approach beyond convenience. A single point of accountability means fewer disputes about whose work caused a new problem, and a rebuild often allows for better solutions than a like-for-like repair — such as regrading a section of the foundation, adding a vapor barrier, or reconfiguring a floor plan that was already outdated before the damage occurred.
Cost and timeline still matter, so it helps to get itemized bids for both scenarios before committing. Compare not just the dollar figures but what each option leaves you with: a patched space that may still carry hidden risk, or a rebuilt one backed by new materials, updated code compliance, and a warranty on the work.
Working With Professionals Once Damage Is Confirmed
Navigating a project that has expanded beyond its original scope is much easier with the right team in place. Comprehensive water damage restoration services typically include structural drying, mold testing, and detailed documentation that can also support insurance claims, which matters if the damage turns out to be more extensive than initially thought. Having this documentation early prevents disputes later about what damage existed before construction began versus what was uncovered during the project.
It also helps to loop in every specialist relevant to the rebuild rather than assuming one contractor can handle everything. Coordinating between a water restoration company, framing crew, and finishing specialists ensures nothing gets missed between the demolition and rebuild phases.
Protect Your Home: Schedule a Comprehensive Inspection Today!

Hidden water damage is unpredictable, but it doesn’t have to derail your renovation if you know what signs to watch for and ask the right questions before demolition begins. Whether the damage turns out to be a minor fix or the start of a larger rebuild, moving forward with a clear inspection, honest cost estimates, and qualified professionals will protect both your home and your budget. Take the time now to check the areas most prone to hidden moisture, and don’t hesitate to bring in an expert opinion before committing to a renovation plan.